Assembling Project Folders and You
*NOTE* |
This tutorial was made
based on the garfield county project, if you are using a different
county, then just substitute your county's name in for Garfield
anytime that it is used. |
This will guide you through the process of assembling the project files
that you have downloaded. The files are seperated because of the satelite
images immense size, it must be seperated because of size constraints
placed upon us. Right now, you should have downloaded and extracted two
folders. One should be titled Garfield Projects, and the other should
be titled Garfield. The following will guide you through the process of
putting the project folder back together.
- First, go into the folder named Garfield, this contains the satelite
image. This folder should be located inside your My Documents Folder
if you followed the directions so far. Accessing the My Documents folder
is pretty easy if you are using Windows XP, simply click the start button,
and then close to the upper right of the menu, a choice should be My
Documents; Click This.
- You Should now be viewing a window similar to this:
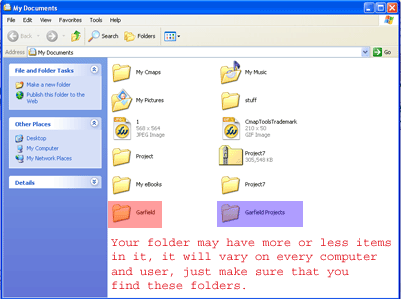
Double click and the folder that is named "Garfield". It
has been highlighted in red in the picture so that it is easier for
you to view. The highlighted effect will not be present in your actual
folder.
- Now you should be viewing something like this:
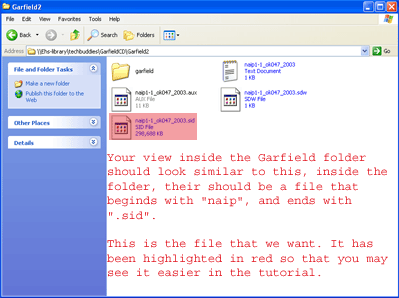
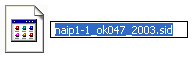
Once you are in the folder, locate the file that starts with "naip"
and that ends with ".sid" It's full name should be what
is listed below in the table. The table below lists what each image
file should be named. Once you find the file, right click the file,
and select the option labled "copy"
| County |
File Name |
| Garfield |
naip1-1_ok047_2003.sid |
| Texas |
naip1-1_ok139_2003.sid |
| Woods |
naip1-1_ok151_2003.sid |
-
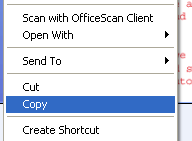
Once you are sure that you have clicked the copy button, you can
now close this folder by clicking the "x" button as you
normally would to close any other window.
- Now you need to reopen the My Documents folder as you did in step
one.
- Once in the folder again, we are going to open the Folder called Garfield
Projects this time, it is the folder that is highlighted in blue.
- Once in the folder, you should see something very similar to this:
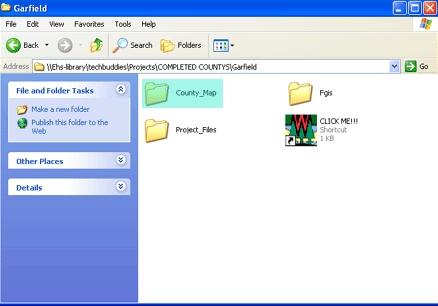
Open the folder named "County_Map", it is the folder that
is highlighted in aqua in the image above. Once you are in the folder,
it should be empty.
- Once you are in the folder, Right Click anywhere in the white area
within the folder, and select the "Paste" Option.
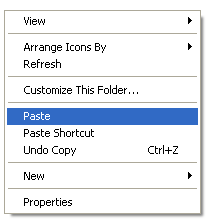
Once you have selected to paste the file in that folder, you should
see something that looks like this within the folder:

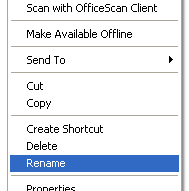
Once the file is done copying, make sure that it is correctly named,
otherwise, it may not work. It should be named "naip1-1_ok047_2003.sid"
If it is not named this EXACTLY, then right click
the file, and select "Rename" from the options, and name
the file to this exactly as it is typed above.
Once the file is in the correct folder, and named correctly, you are
done re-constructing the lesson folder. You may now close this window.
|